In this digital age, we all are pretty much acquainted with the storage media forms. From online/cloud storage to portable devices, we depend on all. However there are many reasons why you would want to erase the hard disk drive on MacBook Pro. If you don't properly delete the data, that data can be stolen. Once the data gets stolen you will regret it. The stolen data can be your personal pictures, videos, bank details etc. Sensitive data can be used for personal benefits. You would not even dare to imagine these things happening to you, so it's better not to take risk like this. Regardless of your reasons, make sure that you backup the data before wiping the drive clean.
Here are some of the ways to erase everything on MacBook pro hard drive.
Let's say you wish to erase only a particular partition volume instead of the entire hard disk. This is the simplest way to erase the hard disk on your MacBook Pro. Here is how you can do that.
1) Access Finder menu by clicking on the Dock icon. You can also access it through Spotlight.
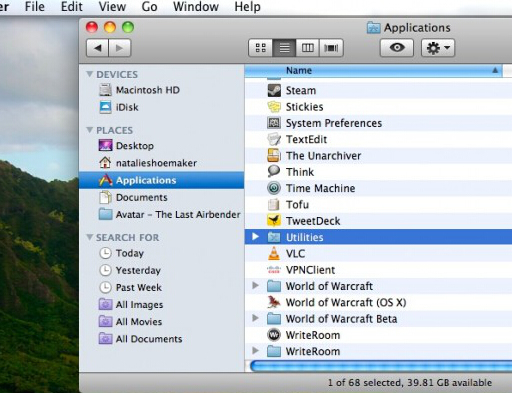
2) On the left click Applications, scroll down a bit to the Utilities. You will need to double click on it.
3) Once the folder opens you will the Disk Utility application. Again, you will need to double click it to launch it.
4) Choose the hard disk drive you wish to erase. The drive names will appear in the left sidebar.
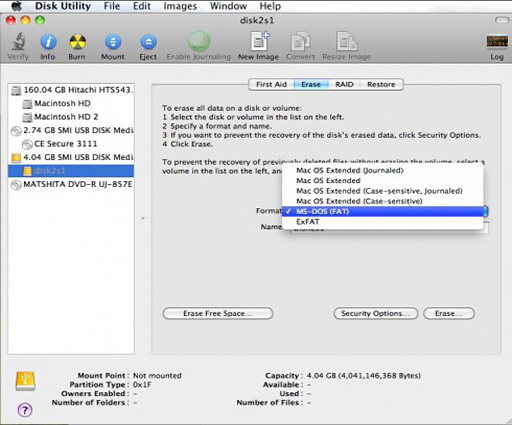
5) Click the Erase tab as shown in the image above.
6) In the erase tab you will see the Format section. Next to this option is the dropdown from where you can choose how you wish to format the drive. For instance, if you wish to use the drive only for one of the Mac OS versions, select Mac OS Extended. If you wish to install the Windows OS on the hard drive, then choose MS-DOS (FAT).
7) You can also give the name to the partition in the Name text box (under Format option).
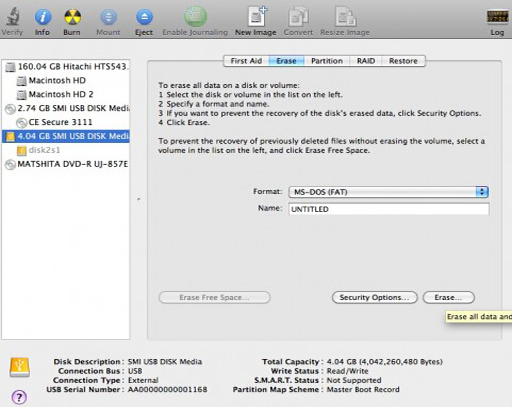
8) Once you have chosen the Format type and given the name to the partition, click on 'Erase...' button.
NOTE: Remember that this method can only be used to erase the hard disk drive which does not have the Mac OS installed on it. This method uses the utilities which can be run only on the Mac OS. If you need to remove the hard drive with OS files, you can use Method 2.
The problem with the Method 1 we discussed above is that once the data has been erased it can still be recovered. The next owner can use some free or professional data recovery software to retrieve your already deleted or formatted data that may still be on your hard drive somewhere. We need to protect our data and personal information. Especially if you are giving the MacBook Pro to someone else, you will need to make sure that your information remains safe.
This is where Safewiepr Eraser for Mac comes into picture. This application not only erases the hard drive but also makes sure that it becomes unrecoverable.
First of all, you need to download and install the program on your MacBook Pro, then launch the program. The while installation process is very easy.

In the last update, you may have noticed that the program provides three wiping options, "Erase File/Fodlers" and " Wipe Drive" and "Wipe Unused Space" . Here, to completely destroying your all data on MacBook hard drive, just select the second wiping option.and click on "Next" option.
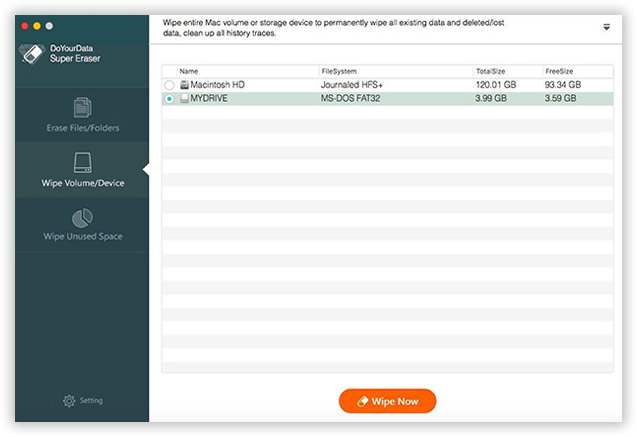
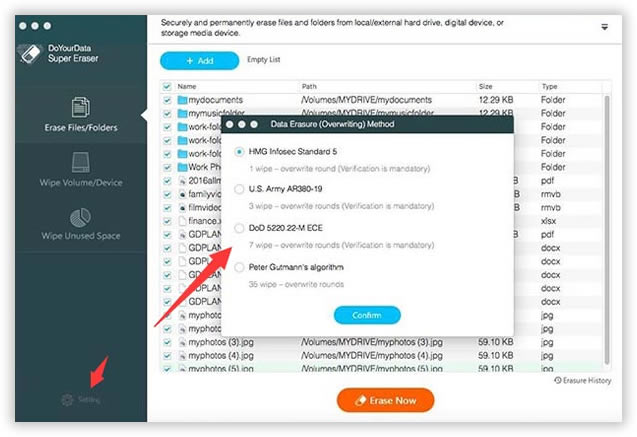
Before starting to wipe your MacBook pro, a window pops up asking you to choose a 'wiping method', it offers 4 wiping algorithm. 7 wipe and 35 wipe will take much time to erase your MacBook Pro. So, we recommend you select 3 wipe.
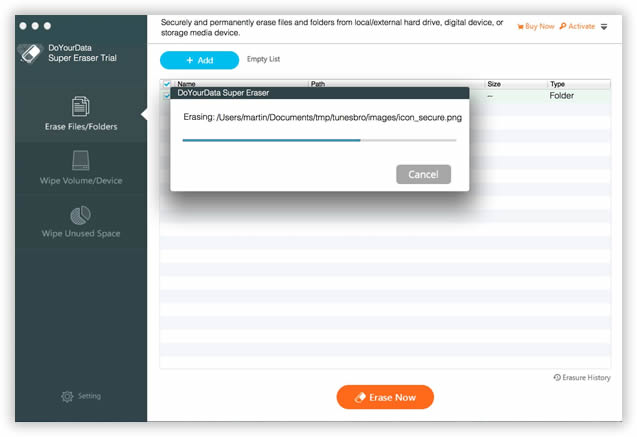
Upon confirming your Wiping Mode, click the Start wiping button to being wiping your MacBook Pro. After the wiping process is complete, an intimating message will be displayed.
If you need to erase everything on MacBook Pro, only formatting the hard drives separately is not a good choice. It is best to use the Data Wiper to wipe clean everything. This way the data will be rendered unrecoverable and your personal information will remain safe. You can reinstall the OS afterwards.
After wiping your MacBook Pro hard drive, you will get a totally new MacBook without any personal information in it. The software will destroy, shred your data and overwrite the disk space of the data for many times. After the process finished, the data in your hard drive will be lost permanently without recovery, you will get a totally new MacBook without any personal information in it.


![]()
![]()
![]()