If you are an Apple user then you probably have a good configuration computer with loads of files stored in it. Whether you use it for official or education purpose, the computer must be filled with piles of documents whether you use them or not. So after a while, you might realize that all documents are actually cluttered together which makes searching important documents in those folders like finding a needle in haystack. A survey from 2014 by DOS says that over thousands of documents are stored in an average computer that are never used.
Further, it is salient for your computer to have some free space to avoid any slow performance that might affect the usage of your computer. In this tutorial, we will manifest how to delete word documents on Mac. We will share both temporary and permanent methods so that you can implement any of your choice.
To accomplish a basic deletion using the in-built feature provided by Mac, use the following procedure. Remember, the documents deleted by this technique can be easily recovered by using any professional data recovery tool. So, if you are looking for a permanent solution then skip to the next solution.
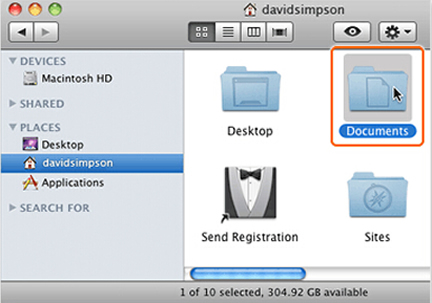
Step 1: Open the folder containing documents and if you are using the default path to save the documents then head on to /Users/ username/Documents.
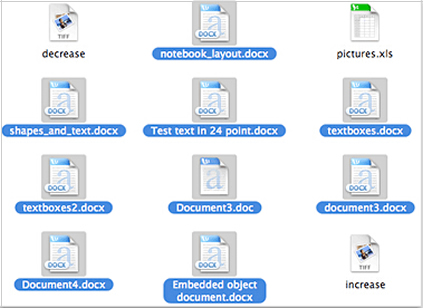
Step 2. Hold down the Mac function key and keep selecting all documents that you wish to delete.
Step 3. With the help of your mouse, drag the files into the trash can.
Step 4. From the Finder option, click on "Empty Trash" and all the selected documents should be erased from the computer.
Cons:
Now, as we mentioned earlier that this a temporary solution. These deleted data can easily be recovered if the computer is scanned with any data recovery tool. So, only use this kind of techniques if the files are not important and if you don't care about their privacy and security. On the other hand, if the documents contains confidential information about your office or contains any kind of client information that you don't want to be glanced by any individual then you must use a third party software to permanently erase them from your computer which brings us to the next solution.
It has been proven that simple deletion will not far enough to completely remove your word document on computer. Fortunately, SafeWiper for Disk is the best upcoming data wiping program that helps to erase all kind of data from an entire hard disk or logical disk permanently. There is no coming back after using this software. So, it is recommended to have a backup of your documents before using this software as it is assured that no data recovery tool can ever restore these deleted documents ever again. It uses very power algorithm and schemes to remove the documents from your computer safely and securely.
Download the program and install it on your computer. It is supported in both Windows and Mac, so make sure to download the right version. Here we take Mac as an example to explain how it works. You can see it provides three wiping option. To delete word document on Mac, click on "Erase Files/Folders" from the left sidebar of the software screen.

NOTE: If you want to wipe your USB drive, or Wipe memory card, or wipe everything on Mac hard drive, then select the second wiping option "Wipe volume/Device".
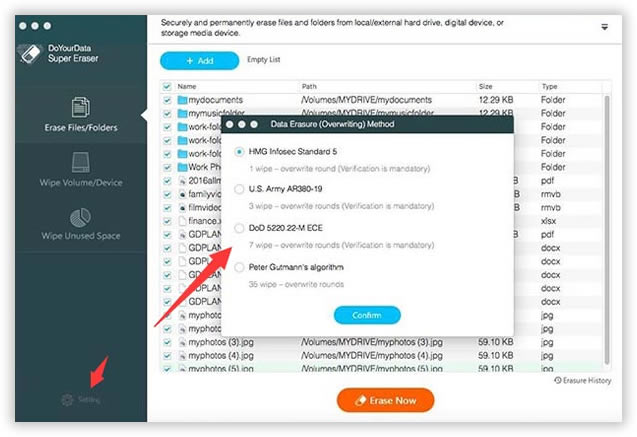
On the next page, you should select the wiping method. You will be prompted with 4 wiping algorithm including HMG, U.S. Army. Peter Guttmann method, DOD, etc. Here we generally recommend choosing U.S. Army wiping method. Then confirm it.
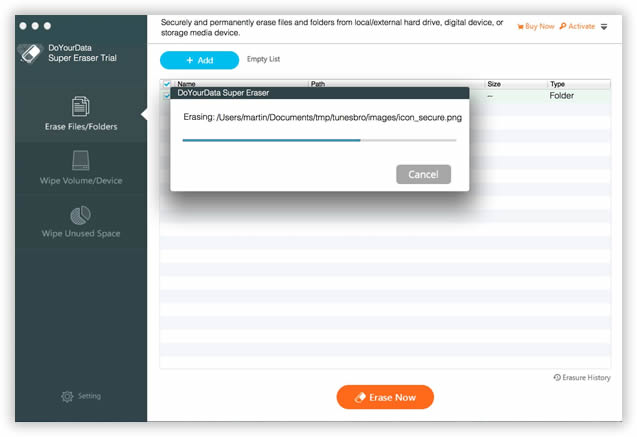
Click on "Erase Now" after selecting the wiping method and wait patiently while the tool erases all documents from your computer automatically. This may take few minutes depending on how much data it is deleting.
After the deletion process is completed, you may check the computer and all documents should be removed permanently. You may scan your entire computer with a data recovery tool and it is assured that no deleted data be ever recovered.
Note: Remember to back up the documents before using this software as the process will be permanent.
After deleting documents using the mentioned methods, you can make a lot of room on your computer. You may organize them more neatly and practically after that and you will be glad to see your computer is well cleaned and files can be accessible more promptly.
There are many tools available on the internet but you may consider using SafeWiper for Disk as it provides the best and myriad of schemes that will flawlessly remove all data from your computer with U.S Army wiping algorithm. You may contact the support if you face any trouble to get the full assistant from the dedicated staff support.


![]()
![]()
![]()